BS”D This is Part 2 of the DIY Home Shatnez Lab Series where we cover a basic tutorial on how to use the Monocular Compound Student Microscope.
How to Use the Monocular Compound Student Microscope
Here we identify the parts of the Amscope Monocular Compound Student Microscope that we will be using for this tutorial.
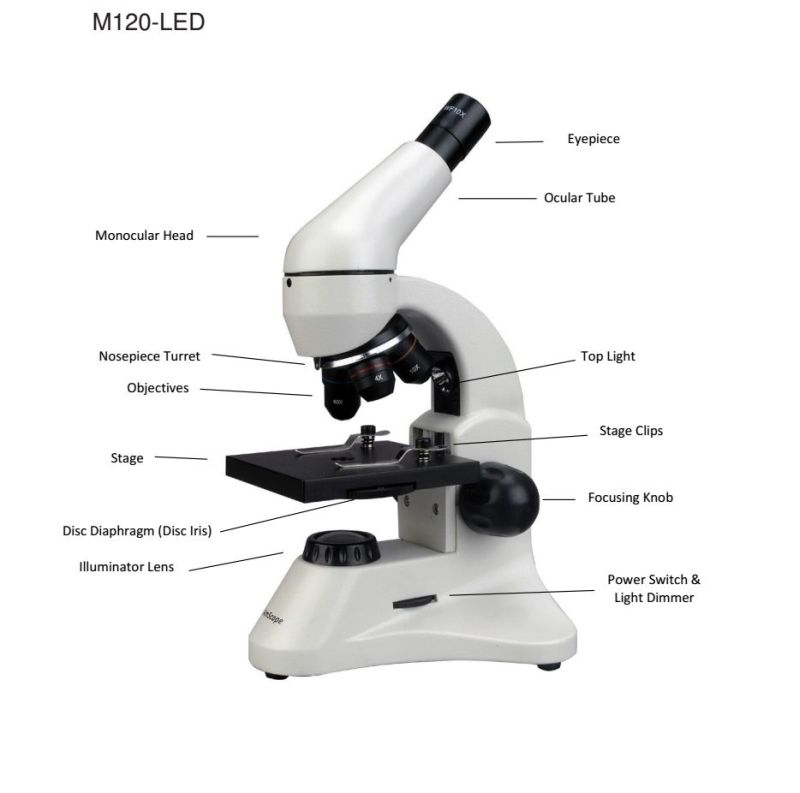
Parts of a Amscope Monocular Compound Student Microscope
Monocular – Notice that there is only one eyepiece for this microscope, hence, the term Monocular is used.
Compound vs. Stereo – This is a Compound microscope, with a higher magnification, useful for observing specimens at the cell level as opposed to a Stereo microscope useful for dissecting specimens.
Eyepiece – This model comes with two Wide-field Eyepiece attachments: WF10X and WF25X. We will be using a USB Camera eyepiece attachment to view and capture the magnified specimens on a computer. The eyepiece is where we insert our USB camera attachment.
Nosepiece Turret – The Nosepiece Turret is a rotational device attached to three objectives – 4X, 10X, 40X. The 4X objective (the shortest) gives you a wide view of the specimen; the 10X (medium) objective gives you a smaller but magnified view of the specimen and the 40X (the longest) gives you the largest magnified view of the specimen up close.
The USB camera comes with its own approximate magnification of 40X. To compute the final magnification, multiply the Eyepiece magnification with the objective. So the combined magnification of the microscope is as follows: 4*40 (=160X), 10*40 (=400X) and 40*40 (=1600X).
Stage and Stage Clips – The specimen is placed on the Stage and held firmly with adjustable Stage Clips.
Focusing Knobs – There are two Focusing Knobs, one on each side of the microscope. They both rotate together to adjust the focus distance between the objective lens and the specimen on the Stage. When you use the 40X objective, there is very little room between the lens and the specimen, so adjust carefully, so that the lens do not break the glass slide thus damaging both the lens and slide.
Top and Bottom (Illuminator Lens) Light – This microscope comes with two light sources, one on top which is placed on the side behind the objectives, and one on the bottom where the Illuminator Lens is. We only need one of the lights operating to illuminate the specimen on the slide.
Power Switch & Light Dimmer – There are actually two dials, one on each side of the microscope, but you can only see one dial in the picture above. Both dials act as a Power Switch which turns on the microscope as well as either the Top or Bottom Light. You only need one light source to operate the microscope. The Top Light is useful for viewing transparent specimens while the Bottom Light is useful for viewing opaque specimens.

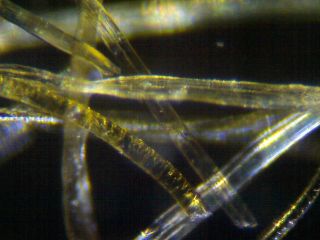
Top Light Source Only
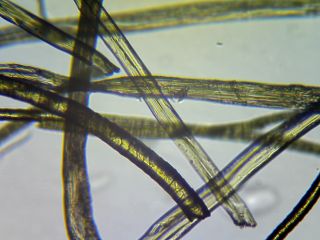
Bottom Light Source Only
Disc Diaphragm – The Disc Diaphragm, located on one side of the Stage, contains 6 Aperture positions to adjust the amount of light that hits the specimen for better viewing. It is used in conjunction with both Top and Bottom Light sources turned on. In our experience, using either one of the Light sources is enough for high resolution viewing. For more information on how Aperture affects viewing, you can read this article.
How to Use the USB Camera and Accompanying Image Software
The microscope for this tutorial comes with a 2-MP (MegaPixel resolution) USB digital camera, USB cable and Image Processing Software that runs on Windows, Mac and Linux.
- Install the software that comes in the CD.
- Connect the USB Camera to the microscope eyepiece.
- Connect the USB cable to the camera and computer.
- Execute the software.
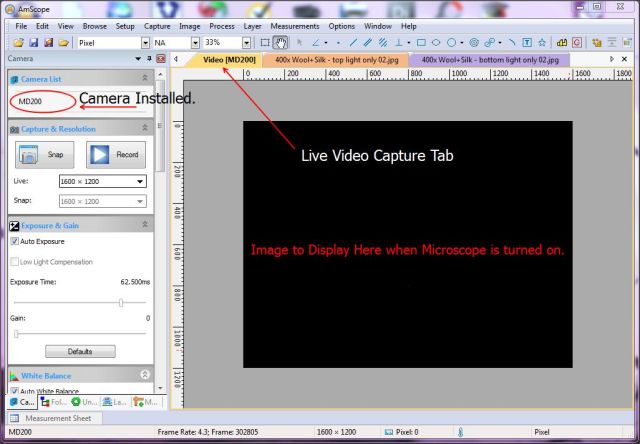
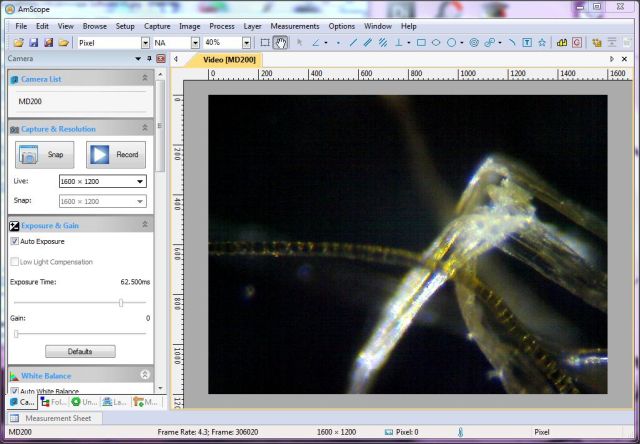
Make sure the Camera appears on the Camera List top-left sidebar as MD200. A Yellow Video [MD200] Tab appears on the top. Ignore the other two tabs for now.
The black rectangle in the main window is where an image of the specimen would appear if the microscope is turned on.
- Turn on the microscope with only the Bottom Light.
- Place a specimen on the slide (Will describe how to acquire a specimen in the next segment)
- Place the slide on the Stage and secure it with the Stage Clips
- Rotate the Turret to select the 4X Objective lens.
- Adjust the focus for the specimen with the Focus Knob(s)
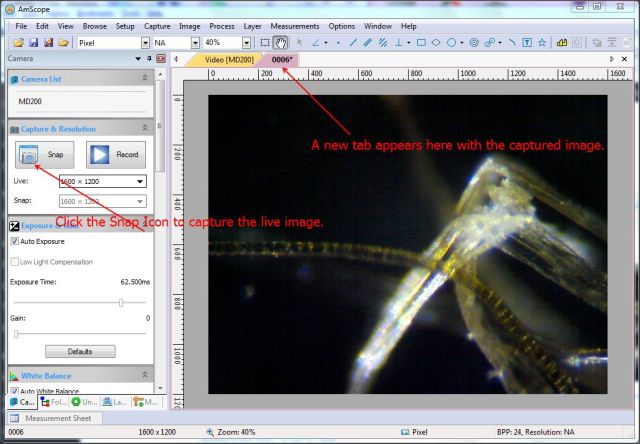
Camera turned on; Live Specimen on Stage
- Snap the image of live specimen with the software
- Save the captured image to disk
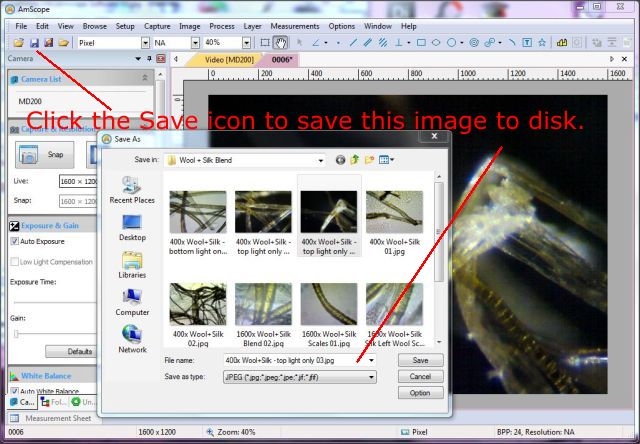
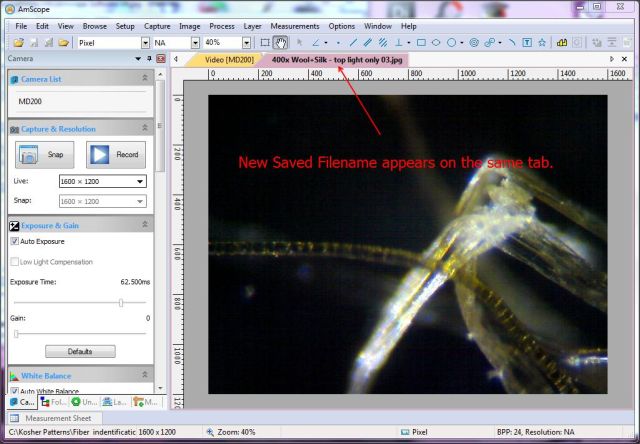
Image Saved to Disk
- Release the staging clips and adjust the position of the slide and the focus knob to capture different views of the specimen.
- Try rotating the Turret clockwise to select the 10X Objective lens, then the 40X Objective lens, and repeat the previous step.
We will continue with the next segment of this series, b’ezras Hashem, with how to acquire a fabric fiber specimen for our slide.